6 Tips to Optimize Your Images for the Web

The adage that “a picture can speak 1,000 words” remains true. Improperly exported images can look low quality, cause your site to load slowly, and run the risk of losing engagement from users. As such, image optimization plays an important role in conveying your message to your audience.
Ultimately, the goal of image optimization should be about increasing your site speed (or page load time), improving SEO, and delivering a seamless brand experience across devices. In this article, we’ll share some tips to make sure every graphic you use is beautiful and crisp, contributing to an improved user experience (UX) for visitors to your site and supporting your website performance optimization efforts.
1
Save Images in the Proper Color Space
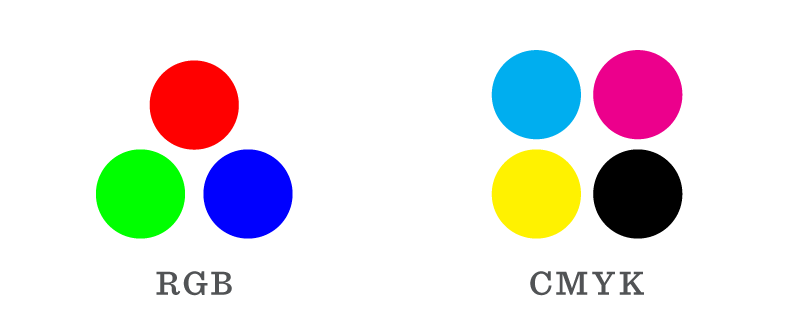
There are two color spaces computers use to display images: RGB and CMYK. RGB (red, green, blue) is the standard color space for digital devices. By default, any image created by a camera or computer is saved in this color profile.
However, you may have images that are CMYK, a color profile used by printers. Before using these images on the web, a program such as Adobe Photoshop can convert the colors to RGB, so your images are vivid and bright online—an essential part of preparing images for web use.
For CMYK to RGB conversion, open the image in Adobe Photoshop. Go to Image on your menu bar, and in the dropdown hover over Mode and select RGB Color. This will convert the image to the RGB color space and you may notice some colors are more vibrant. Next, go to File then Save As and save the file. Be sure to change the file name so you or someone else knows it is a file for digital applications.
2
Compress the File Sizes
When saving images for the web, the recommended file size should be less than 500KB for optimal page load time and user experience. For any high-quality images (i.e. hero images), aim to keep the image size below 1-2MB (2048 kilobytes) to maintain fast page loading speeds. That being said, you should always aim for the lowest size possible without compromising the overall experience or quality of the image.
Image compression settings play a big role in achieving the desired quality that will display on your website. The goal is to achieve good image quality and a small file size. Generally, between 70-80% is the right image compression level to avoid seeing pixelation, or the individual points of color.
Reducing image size is particularly important for pages with multiple visuals, like blog posts, galleries, or service pages.
| Image Type | Recommended File Size | Typical Dimensions (px) |
|---|---|---|
| Background Image< 2MB1920-2560 wide | ||
| Hero Image< 1MB1280-2500 wide | ||
| Product Image50-500KB100-2048 square | ||
| Blog/Article Image10-50KB1200x630 (3:2) | ||
| Thumbnail10-50KB150x150 | ||
| Logo/Icon10-50KB100-250 wide |
Note: The amount of compression will vary based on several factors including the original image’s file size and format. You can use a free tool such as Imagify, or other relevant image compression tools, to further compress the file size.
3
Use the Correct File Format
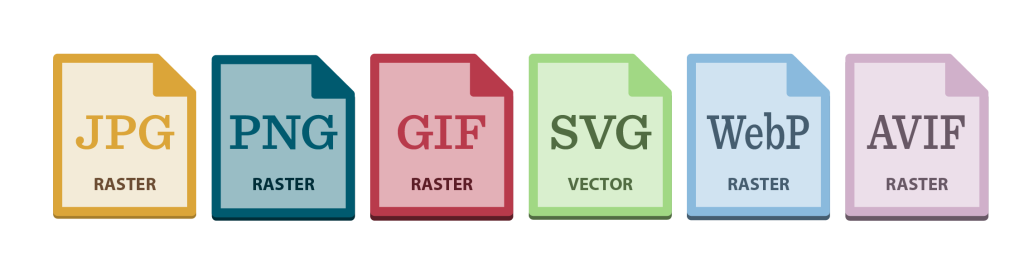
There are six major file formats for saving out images and graphics for the web: JPG, PNG, GIF, SVG, WebP, and AVIF. Each file format has its benefits, drawbacks and intended use cases tied to image SEO and performance.
Whether your image or graphic is a raster or vector will determine which format its best suited for. Raster images are created with pixel-based programs or captured with a camera or scanner. These images have a finite number of pixels and can lose quality when scaled larger.
JPG, PNG, GIF, WebP, and AVIF are formats best suited for raster images, which are made up of pixels and can lose quality when scaled up. Vector graphics, on the other hand, are created using vector software and can be scaled infinitely without losing clarity.
SVG is the primary format for vector graphics on the web. While vector files can be exported as JPG or PNG for compatibility, this removes the scalability benefits of vector formats.
WebP and AVIF are modern raster formats optimized for web performance. They offer significantly smaller file sizes compared to older formats like JPG and PNG, while maintaining visual quality—making them ideal for fast-loading websites and improved user experience.
JPG

JPG or JPEG is the most common raster file format for images.
Pros
- Smallest file size
- Best for high quality photos
- Compatible on web and any device
Cons
- Image quality can be greatly reduced if compressed too much
- JPGs do not support transparent backgrounds
When to use JPG
JPGs are best for non-moving photos and other files that don’t require transparent backgrounds. Avoid using JPGs on colored backgrounds.
PNG
PNG is another common raster format that is more versatile than a JPG. PNG can support more colors (over 16 million) and support transparent backgrounds, or an alpha channel.
Pros
- Ability to have a transparent background for layering your image on colored backgrounds
- Can be compressed without losing as much quality as a JPG
Cons
- File sizes tend to be larger than JPG
- Does not support animation
When to use PNG
PNGs are best for graphics with sharp edges, text graphics, logos, icons and other designs. Use a PNG for graphics that need to be placed on non-white backgrounds, such as all-white logos on a black background.
GIF
GIF is a raster format that allows you to have animated images. Images are sequenced on top of each other to create motion.
Pros
- Ability to create animated images and messages
- Supports transparent backgrounds
Cons
- Image quality and file size are tied to the number of colors. More colors in the image will have a sharper image but larger file size. Less colors in the image will have a grainier image but smaller file size.
- You’re limited to using an image with 256 colors.
When to use GIF
GIFs allow you to have the flexibility to display multiple images and interesting transitions in the same graphic. However, avoid using photos and graphics with many colors if you need a small file size.
SVG
SVG is a vector format that allows you to have sharp graphics and manipulatable objects on the web. SVG can be created and edited in vector programs such as Adobe Illustrator or Figma.
Pros
- Small file size
- Infinite sizing (vector) without losing quality
- Flexibility for developers (can change settings including color and size)
- Can be edited by in a vector program such as Adobe Illustrator
- Supported in Microsoft Office products for graphics
- Can be animated
Cons
- SVG files are not ideal for displaying high-quality digital photos
- Can introduce security risks if SVG files are not sanitized before upload
When to use SVG
SVG can be used for logos, icons, graphics and other illustrations used on the web. Graphics can be stretched and compressed without compromising quality and look great on mobile devices with high pixel density displays (see more below).
WebP
WebP is a modern raster format developed by Google that offers superior compression while preserving image quality. It supports both lossy and lossless compression (two different methods for reducing file sizes), transparency (like PNG), and animation (like GIF).
Pros
- Smaller file sizes than JPG and PNG
- Supports transparency and animation
- Compatible with most modern browsers
Cons
- Slightly slower rendering on some older systems
- Not universally supported in all design software
When to use WebP
WebP is ideal for use across your entire website, especially when performance matters. Use it for photos, graphics, and illustrations where supported. For maximum compatibility, consider serving WebP with a JPG/PNG fallback using the <picture> element in your HTML.
AVIF
AVIF is an emerging raster format that offers even better compression than WebP, making it the most efficient image format currently available. It supports HDR, transparency, and deep color.
Pros
- Excellent compression—up to 50% smaller than WebP
- Supports advanced color and HDR
- Transparency and animation support
Cons
- Slower to encode
- Still gaining support across design tools and older browsers
When to use AVIF
Use AVIF when you need the smallest possible file size without sacrificing quality—especially for hero images, background photos, or content-heavy visuals. Be sure to include a fallback format like WebP or JPG to ensure compatibility.
4
Export Multiple Sizes for High Pixel Density Displays
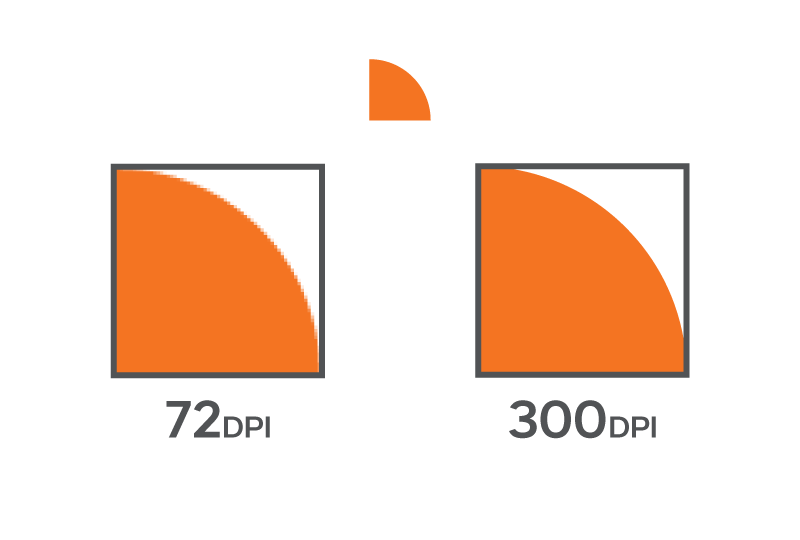
As mobile devices have become the preferred device for users to view digital content, they have higher resolution screens than the typical desktop computer. These HiDPI, Retina or high-pixel density displays have more than 200 pixels per inch (PPI). The standard for web and most desktop computers is 72 PPI. If a user views a 72 PPI image on their mobile device versus a computer, it will not look as crisp as an image saved out with more pixels.
There are two ways programs such as Adobe Photoshop and Illustrator can save out your images and graphics to accommodate mobile and desktop browsers.

- You can export your image with @2x and @3x scales. This means the program will automatically create a version of your image that is 2x (200%) or 3x (300%) the original size. The user’s mobile web browser will automatically display the 2x or 3x image in the same space as the original size.
- You can export your image at a higher resolution. For example, in Adobe Photoshop or Illustrator, you can save your image at 96 or 150 PPI. Note: Your file size will be larger as the program is adding more pixels to your image.
5
Upsizing Smaller Images by 115%
If you have a small raster image that you need to resize to be larger, you can incrementally upsize it by 115% in Adobe Photoshop. This will reduce the amount of pixelation that will occur as you increase the physical size of the image. To do this, open your image in Photoshop. In the menu bar, go to Image and select Image Size. In the dialog box, under Width and Height, change the units to Percent and then type 115% in both of the fields. Make sure the box is checked for Resample and Bicubic Smoother (enlargement) is selected.
6
Ensure Image Accessibility
Image optimization isn’t just about speed and quality in 2025—it’s also about usability and inclusivity. Ensuring your visuals are accessible not only has SEO benefits but it also improves the user experience (UX) for visitors to your website, and helps ensure ADA compliance. Here are 5 quick best practices for creating accessible images:
- Use descriptive alt text for all meaningful images.
- Use empty alt tags (alt=“”) in your websites code to label purely decorative images and signal screen readers to ignore them—preventing unnecessary audio clutter for users relying on assistive technologies.
- Name your image files clearly (i.e. hospital-lobby-design.jpg instead of IMG_0414.jpg).
- Avoid embedding important text in images (e.g., flattening text in Photoshop or Canva) and instead, present that content using live HTML and CSS so it’s accessible to screen readers, searchable, translatable, and responsive.
- Ensure contrast between text and background if images include overlaid content.
Tip: Use loading=“lazy” on <img> tags to defer image loading until they appear in the users view. This improves page speed without sacrificing quality.
Sharp and Focused Images Will Keep Eyes on the Page
Image optimization might seem like a small detail, but it can make a big difference. When your visuals load quickly and are easy for search engines and users to understand, your whole site performs better. By putting a few best practices into place—like using the right image file formats, compressing images properly, and keeping accessibility in mind—you’re helping your content work harder without sacrificing quality. And when your site looks good and loads fast, everyone wins—your audience, your brand, and your team.
Frequently Asked Questions About Optimizing Images for the Web
1. Why should I optimize images for my website?
Image optimization improves page load time, enhances user experience (UX), reduces bounce rates, and helps boost your site’s visibility through SEO image optimization. It also ensures your visuals look crisp and professional on all devices.
2. What is the best file size for web images?
Ideally, most web images should be under 500KB. Hero images and backgrounds can be larger (up to 1-2MB), but the goal is to keep file sizes as small as possible without compromising quality.
3. Which image format is best for websites?
Between WebP vs AVIF, both are currently the most efficient formats for web use, offering excellent compression with minimal quality loss. However, JPG and PNG are still widely used for compatibility.
4. How do I convert images from CMYK to RGB for web use?
In Adobe Photoshop, go to Image > Mode > RGB Color to convert from CMYK to RGB. Then save it as a new file to ensure it’s ready for digital use.
5. What does image compression do?
Image compression reduces file size by removing unnecessary data, which speeds up loading times. The right settings allow you to compress images without noticeable quality loss.
6. How can I make images look sharp on Retina or HiDPI screens?
Export images at @2x or @3x resolution or save them at 96 or 150 PPI. This ensures they appear crisp on high-density displays like smartphones and modern laptops.
7. What is alt text and why is it important?
Alt text provides a text alternative for images, which helps screen readers describe visuals to users with visual impairments and improves on-page SEO.
8. Should I use lazy loading for images?
Yes, adding loading=“lazy” to <img> tags helps defer image loading until they appear in the user’s viewport. This improves initial page load speed and performance.
Looking to make your website faster and your visuals more effective? Start by applying a few of these image optimization tips—and if you need a second opinion or extra support, contact us to see how we can help you fine-tune your site for better performance and a stronger user experience.
"*" indicates required fields
By signing up you are agreeing to our Privacy Policy.